How to Prepare Your Irrigation System for Winter
|
|
Time to read 5 min
As the cold weather approaches, it is important to take measures to protect your sprinkler system from potential damage. Freezing temperatures can cause water to expand and damage your system, leading to costly repairs. In this blog, we will provide you with some tips to help you protect your sprinkler system and ensure it is ready to go when the warmer weather returns. By taking a few simple steps, you can avoid costly repairs and ensure your sprinkler system is functioning properly for years to come.
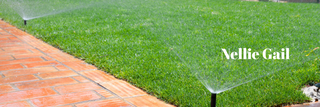
Winter Is Here Prepare Your Irrigation System
Winterizing your system involves taking certain steps to protect your pipes, valves, and other components from freezing. One of the most important steps is to turn off the water supply to your sprinkler system and drain all the water from the pipes. This is because, when water freezes, it expands, and this can cause pipes to crack or burst. By draining the water from the pipes, you eliminate the risk of freezing. Here's what you need to know about wintering your automatic sprinkler system.
Turn Off The Water
Winterizing your sprinkler system is a crucial step to protect it from the harsh winter weather, and the first step in this process is to shut off the water flowing through the system. Most installers make it easy for you to shut off the water to the system. However, if you are unsure where the main shut off to the system is, it's always best to contact your original installer.
The main shut off valve is usually located inside your home or in an underground valve box near the water meter. Once you have located the shut off valve, turn it off and open the drain valves to let out any remaining water. You can do this manually or use an air compressor to blow out any remaining water from the pipes. This will help prevent any water from freezing and causing damage to the system.
It's important to make sure that all water is removed from the pipes, including any water in the sprinkler heads and back-flow prevention devices. These devices should also be drained and removed from the system, as they are prone to damage from freezing temperatures.
By shutting off the water and removing any remaining water from the pipes, you can ensure that your sprinkler system is protected from the damaging effects of freezing temperatures. If you are unsure about how to winterize your system or have any questions, it's always best to contact a professional installer or service technician.

Shut Down The Controller
While shutting off the water supply is the first step in winterizing your sprinkler system, the next step may not be as simple. All automatic sprinkler systems have an electrical control panel that regulates when the system turns on and off. To winterize your system, you will need to take steps to protect this control panel from damage due to cold temperatures.
In some cases, you may need to disconnect the power to the controller. This can be done by unplugging the controller from the electrical outlet or shutting off the circuit breaker that controls the system. This will prevent the controller from turning on and off during the winter months when it is not needed.
Alternatively, some systems have a "rain mode" feature that can be used to turn off the system without disconnecting the power. This feature puts the system in a standby mode, preventing it from turning on automatically. It's important to consult your owner's manual or contact your installer to determine if your system has this feature and how to activate it.
In addition to protecting the control panel, you should also consider protecting any exposed wiring and electrical components. This can be done by wrapping them with insulation or covering them with a plastic bag to prevent moisture from getting in.
By taking these steps to protect your system's electrical components, you can ensure that your system is ready to use when the warmer weather returns.
Remove The Back-flow Preventer And Take Care Of Risers
Winterizing your sprinkler system involves several steps to protect it from the harsh winter weather and prevent costly repairs. After turning off the water supply and draining all the water from the pipes, the next step is to remove the back-flow preventer and ensure that all water is drained from the device.
Some experts suggest storing the back-flow preventer in a safe place until spring, while others say it's okay to reinstall it. To be safe, it's better to leave it detached until the system is put back into commission.
Next, attach a wet/dry vacuum to the system's risers to remove any remaining water in the system. You may need to use duct tape to reinforce the seal between the vacuum's hose and the piping for thorough removal.
If your system has exposed valves, remove them, drain them, and store them until spring. By taking these steps, you can ensure that your sprinkler system is protected from the damaging effects of freezing temperatures and ready to use when the warmer weather returns.

Removing Water From The Pipes And Sprinklers
The most important and time-consuming step in winterizing your sprinkler system is removing all the water from the pipes and sprinkler heads. This is crucial to prevent water from freezing and cracking the pipes. There are two methods for removing water from the system: using a wet/dry vacuum or blowing out the water with air.
While both methods have their pros and cons, blowing out the water with air is generally less time-consuming and provides a more complete removal of the water. However, it's important to use caution when using air to avoid damaging the system's components. It's recommended to hire a professional or consult your installer for guidance on the best method for your specific system.
By taking the necessary steps to remove all the water from the Irrigation system, you can ensure that your sprinkler system is protected from the damaging effects of freezing temperatures and ready to use when the warmer weather returns.

Get The Right Equipment
To remove water from all areas of your sprinkler system, it's important to create the right amount of air pressure. Typically, an air compressor that can produce 50 cubic feet per minute is needed for most systems. However, it's important to use caution when using an air compressor to avoid generating too much or too little pressure. Make sure the compressor has an air pressure regulator and gauge to ensure that you're generating the right amount of pressure for your system. Too much pressure can damage the system, while too little pressure won't remove all the water.
Connect The Air Compressor
When using an air compressor to blow out water from your sprinkler system, it's important to connect the compressor to the downside of the system and attach it to the backflow preventer riser. Begin by turning on the valves one at a time using the automatic control panel, starting with the last valve and working your way forward.
Gradually increase the amount of pressure being applied from the compressor, taking your time to prevent accidents or damage to the system. Blow out one valve at a time and repeat the process to ensure all the water is forced out.
Lastly, blow out the main line, disconnect the air compressor, disconnect the power to the controller, and cap any openings that could cause problems.